Will I give up? Fuck no I won't. Because I lack the common sense which would otherwise restrain my ambitions, I'm going to rocket ahead and skip directly to building the Mk.II habitat:
 This means I'll need to carefully consider which enclosure to use as I'll need to be dead certain this time that it'll keep water out. Mainly so that this doesn't happen:
 That means back to square one, almost. I'll need a battery pack, a different pump, and of course a different enclosure. This is what I have my eye on:
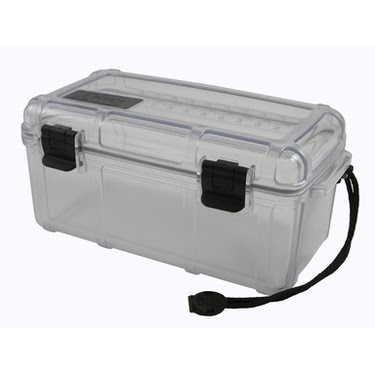 It looks ideal. Scuba dryboxes rated deeper than three feet or so tend to be pretty small. This was the largest I could find with a decent depth rating (100 feet!) with an interior volume of 7.549" x 3.606" x 3.326" (Online ruler for reference). I need to be able to fit the small video recorder (thumb sized), a small feeder, a water bottle/dish (as I've decided this will have no moon pool) and an LED light. Based on the combined sizes of these items and the enclosure as well as the small size of the breed of hamster I'll be using, I think the Otterbox 3500 will just suffice. Below is a mockup of the interior. When you click the image (and then expand it) it should appear actual size, and everything is precisely to scale relative to everything else:
 I plan to have the heater powered by a small USB battery pack inside the enclosure, sealed in a ziplock bag and packed under wood shavings (as some of you pointed out the hamster may be frightened and would be comforted if it could burrow). This means zero allowance for leaks, for obvious reasons. Which is why the new habitat will not have a power cable running down the umbilical, because I don't want to make more holes in the enclosure than I have to. This also means that the LED light will be self contained and battery powered as well.
Here's a list of things I still have that can be reused for the new habitat:
~video recorder
~LED light
~USB battery pack
~Air hose
~kitty litter (will be packed under the shavings to absorb urine)
Here are the things I need to continue:
~Deep water aquarium pump
~New enclosure
~Power drill
~Hot glue gun [edit: silicone sealant instead!]
~Portable battery pack
~USB heated gloves (for the heating element)
I can afford the hamster food, the feeder, the water bottle and wood shavings myself. The rest of it, not so much. I'm going to build this thing no matter what. But if you felt like speeding up the process by pitching in, I'd be grateful. I didn't realize how complex this project would become when I started and the setbacks have been frustrating but the concept is so great that I'm determined to make it work in the end, provided I can get my hands on the parts.
If you've got any suggestions for alternate component choices, or some kind of extra I could provide to compensate you guys for your donations (beyond the game servers I mean) let me know in the comments.
Please replace the hot glue gun and hot glue with copious amounts of marine grade silicone sealant. Hot glue will likely fail under any sort of stress (pressure, tubes bending, etc.).
ReplyDeleteSilicone sealant. Gotcha.
ReplyDeleteThe fact that the original shell wouldn't keep dry was a huge disappointment, so this time I'm not fucking around. I've learned a lot of stuff in the process I wish I had known from the outset, but eh. You live, you learn, you conquer the depths for all hamsterkind.
I'm not sure if this would be at all possible (due to funding/my gross misunderstanding of how webcams exactly work) but have you considered putting a webcam in the enclosure for a live feed on how the hamster is doing on food/water/the novel? You could post the link for it, and let other people see too.
ReplyDeleteI think the removal of the moon pool and the need for the battery pack sort of removes all the self sustainability aspect of the project. Now your just of putting a hamster in a water proof box underwater.
ReplyDeleteAlso wouldn't the hamster try to eat the battery pack. Maybe you should glue it to the ceiling of the container rather then put it on the floor so the hamster can't get to it.
ReplyDeleteNever give up. Never surrender. The briny depths beckon.
ReplyDeleteChris: The battery is encased in aluminum. Otherwise, yeah, I'd worry about the little guy gnawing on it.
ReplyDeleteAnd this was never going to be self-sufficient; even with the moon pool I'd still have to retrieve it to refill the food. The Mk.II habitat will actually be able to go deeper and stay down longer than the Mk.I due to the bigger battery, stronger pump and scuba-rated enclosure.
One idea I had was to drill a hole for the nozzle of the water bottle, stick it through, seal the edge of the hole with silicone sealant and then remove the bottle itself. So the nozzle would feed in directly from outside. I'm just worried that the pressure might force water past the metal ball. I'll have to do some tests.
Coolio :)
ReplyDeleteOne question, how long do you think he will have to stay down there until he gets the ability to shoot bees from his paws and how will handle the situation when he finally does?
So maybe I don't fully understand "how moon pools work", but couldn't the Mk.I be repaired by building up the walls so that there aren't any waves washing over the top? Hamster Levees if you will.
ReplyDeleteBut I'm glad you are pushing on with the plan.
Seconding Connor's webcam comment.
ReplyDelete