Monday, December 1, 2014

Hyper-intelligent rodents

http://www.iflscience.com/brain/mice-part-human-brains-are-smarter-their-peers


"By injecting human cells into mouse pups, scientists have created mice whose brains are part human. These hybrid mice grew up to be smarter than their peers, performing much better in tests for memory and cognition. Although this may sound like the plot of a terrible Sci-Fi film, researchers hope to glean a lot of valuable information from these experiments."

Are you thinking what I'm thinking? (No, this is not a Pinky and the Brain reference) OF COURSE YOU ARE! If you support something like this in the first place we probably have the same neurological disorder! It's all so clear to me now. The missing piece was always intelligent colonists to populate Hampture. Dwarf hamsters are not the brightest bulbs.

Imagine! Mice who could operate small buttons or levers! Who could
, with a lot of training, pilot mini-subs! Or at least comprehend that they're underwater. And who knows what living under pressure would do to their transgenic brains? And to think, those stuffed shirts at the Academy call me insane. I'LL SHOW YOU WHO'S INSANE, BOARD OF ETHICS! 

Sunday, November 23, 2014

Artificial lagoon!

So, I've been thinking about how to expand beyond the aquarium. Not much will fit in there, and some people (rightfully imo) question what the point is of putting a habitat into an aquarium not much larger than it is.

What I really need is a body of water under my control. Very close by, so I can supply grid power and wifi for a webcam. But also with ideal visibility. The ponds near me are all muddy as hell. Then the solution hit me like a ton of ballast. Inflatable pool!

This is the biggest (on a budget) one I can find. It's 18 feet across by 48 inches/4 feet deep.
http://www.amazon.com/Intex-Easy-Pool-18-Feet-48-Inch/dp/B00AA8AAH0/

This is the next biggest. 15 feet across by 42 inches deep.
http://www.amazon.com/Above-Ground-Swimming-Complete-Intex/dp/B000QYZHRQ/

There's a big price difference between the two. The second biggest is $175. The biggest is just over $300. I'm not sure that jump in cost is worth it for 3 more feet of diameter and 6 more inches of depth. But if I can talk one or more of you crazy bastards into paying for it, I'd prefer the biggest one. Why bother unless you're gonna give it 110%, right?

This completely solves the problem of where to put the increasingly large (and soon modular) habitats. The depth is respectable but does not require anything beyond a snorkel and mask to work in. There will be a distance of nearly three feet between the top of Hambase Delta and the water's surface, and the curved blue outer wall should help create the illusion that the habitats are in open water. Maybe some fake coral here and there? And LED illumination at night.

Whereas livestreaming the existing habitat in the aquarium involves pointing a laptop camera at it from outside (in air), livestreaming the modular habitat complex I could finally establish in a pool like this would involve a webcam on a long USB cord, housed in a watertight weighted container. I could periodically move it around to view the growing colony from different angles.

Because all of this would be right outside, there would be no need for complex, failure prone solutions to power (like solar panels and lead acid batteries) or connectivity (like mifi or tethering, as if I can afford the data plan that would require anyway.) This is in all ways (I think) the ideal solution for how to continue building bigger, more ambitious habitats than will fit in the aquarium and still being able to stream video to my supporters.

But as usual I don't have the resources to make this happen on my own. I'll need some funding. We can call it "art" if that helps you justify donating this kind of dosh to such a project without feeling weird. }:3 I never enjoy soliciting money so brazenly but this is something I need your help for. It represents a revolutionary step beyond the restrictive confines of the aquarium, a much cooler environment to put habitats in (and film/stream them) and a testbed for eventual Summertime lake deployments. More than any other addition, this one in particular will drastically improve your experience as a spectator and make possible all kinds of future developments there's simply not space for right now.

Saturday, November 22, 2014

Weights arrive!

Holy hell. I will tell you one thing right now. Hambase Delta is the largest single module I will ever build, because the amount of weight needed to sink this fuckin' thing very nearly exceeds what I consider to be realistically man portable. Any larger than this and we get into "requires a crane" territory.

Even with 60lbs of weight, it's just barely negatively buoyant. I haven't accounted for the air displaced by the weights (they sat inside the enclosure for the buoyancy test) so all told, it's probably still not quite negatively buoyant, but that's easily solved by pouring some lead shot into the spaces around the weights when they're inside the ballast pods. I really don't want this to be much heavier than it already is because I have to fuckin' carry it, but it also shouldn't be *barely* negatively buoyant because then even a gentle current can knock it around when it's underwater. A minimum of a few extra pounds to keep it in place will be added.

I am not pleased with the size of the skylight I purchased, which is why I've been holding off on installing it. I want the window to take up as much of the lid as possible. I've heard Home Depot will custom cut lexan to any dimensions you like. That seems like the way to go. When I have more money to spend on this project I'll head back there and have them cut a custom skylight for me.

The other thing is, this habitat doesn't make a lot of sense for use in the aquarium. It will (just barely) fit, but the roof will be no more than an inch from the surface. And there's less than an inch of clearance on either side of it, depthwise. It's looking like the only place it will make sense to deploy this huge motherfucker is in an aboveground pool (one of those blue inflatable ones maybe?) or a natural body of water.

There's always the pond I put Hampture Mk.III into that one Summer, but it's murky as fuck and there's no access to grid power or wifi to livestream. So I'm thinking once I finish the habitat itself, the next big purchase will be one of those blue inflatable pools to stick it in. Maybe with some sand poured in as a simulated ocean floor.

This way it's close enough I can still use grid power and livestream the habitat. Speaking of which I am getting ready to livestream the aquarium again for the first time in ages, now that Hambase Alpha is finally kitted out for year-round use. Stay tuned.

Friday, November 21, 2014

New heater successfully installed in Hambase Alpha

It is now fit for all season use. It fogs up a little inside from the condensation but the silica gel prevents it from getting too bad. (EDIT: A few hours later the condensation is gone. The silica litter just needed time to absorb the moisture I guess.) The important thing is comfort though. And not having to spend the money to heat 100 gallons of water 24/7. 


I really do prefer this habitat, it's about as good as it gets for something that's a reasonable size to use in aquariums. I urge you to copy this one if you build you own, including using a reptile heater pad like I have as it did turn out to be vastly better than those little USB pads I was using before.


Cousteau lookin' cozy as fuck:


Wednesday, November 19, 2014

New heater for Hambase Alpha

Since the old heaters stopped working (water got into the plug ports in back before I figured out I needed to seal those with silicone) I haven't been able to use Hambase Alpha in the winter as the aquarium's out in the garage and I don't feel like spending the $$$ to keep a hundred gallons of water warm all the time.

So I've ripped out as much of the old heaters and wiring as I could (cyanoacrylate glue doesn't fuck around) and this time did not make the mistake of trying to use the chemical spray that's supposed to un-cure the glue as that doesn't work for shit and basically ruined one of the old habitats I tried it on, such that it had to be tossed out. Instead I worked at it with a chisel and hammer until as much was removed as possible. Soon I'll drill a new hole for the (110v!) power cord for the new 5 watt heater pad. There will also be a layer of cardboard under it to insulate it from the habitat floor. I figure this will keep me busy while I wait for the lead weights to arrive.

I couldn't find one the exact size of the habitat floor by the way. Besides which, I don't really think heating the entire floor is a good idea. If I heat up the spot where they do their business, it'll cause the urine to evaporate into the air and all kinds of related nastiness. Also don't wanna heat the food as it accelerates decomposition. So just the center of the habitat should be fine. It's plenty of surface area for 1-3 hams and it gets very comfortably warm. I've tested it out already in the land cage and it's quite the popular place to sleep. :3

If you're building your own Ham hab at home, learn from my mistakes and use a heater pad of this type to begin with. It'll be a lot less messy than the gradual additive, subtractive, evolutionary process of designing and redesigning Hambase Alpha that I've been through so far.

At right: Bonus pic of a hambro testing out the heater pad under his travel carrier. :'3 :'3

Tuesday, November 18, 2014

Some bad news, some good.

Bad news: The ballast containers aren't coming. The website I ordered them from listed them as in stock but the guy didn't actually have any. They're discontinued and hard to find, so he refunded the money.

The good news: I used that money instead to buy all of the lead weights I'll need. So, barring some problem with the order, all I need now is to find an affordable source for 3x Otterbox 3500 in black.

Sunday, November 16, 2014

Ballast pods ordered!

Thanks to an astonishingly generous $100 donation I was able to purchase three black Otterbox 3500s needed to hold the lead block weights, which will weigh down the new habitat. The leftover amount will be used to buy the water bottle and running saucer. I still need money for the weights, but I'm sure that'll happen at some point.

Anyway, thanks for enabling my flagrant mental illness which for whatever reason manifests as the urge to build functioning scale model underwater cities for rodents! You know who you are. I really appreciate every donation, big or small. This is a weird hobby but very fun to do and evidently fun to spectate. I'll keep doing it as long as I am able to.

Monday, November 10, 2014

Going nowhere fast unless something changes

I'm about to put in the skylight. A bunch of real life shit got in the way, sorry for the delay. But in the process of figuring out what order to do the steps in, I've realized a couple things.

1. This thing is going to be very hard to weigh down. It is likely to need three ballast pods, each twice the depth of the ones Hambase Alpha uses so I can pack in 4 lead block weights per pod. That's 60lbs total.

2. This hobby stays affordable only when the habitats are small. Cost increases non-linearly with habitat interior volume mostly due to the cost of lead. The current habitat is likely to be the largest single module I ever build. I'm also gonna need help buying the ballast pods and block weights in particular. If you're on the fence about funding this weird shit, now's the time.

3. It will not fit in the aquarium. I mean, if I saw away all the acrylic around the top I can get it in there but the roof of the thing will be just inches from the water's surface. Really not much point then. I will need to find either a very clear natural body of water to deploy this into, with access to grid power nearby or get one of those big partially inflatable above ground pools to stick it in.

At some point I'd like to build a new Hambase Alpha as well. Learning from the handful of small mistakes I made with the design of the first one. And this time I'd document every step of construction, for the purpose of publishing an instructable so you guys can build you own. This comes after the completion of the new huge habitat however. That's really sucking up resources atm.

Bonus render of Ham colony to the right. The running saucer will fit on the top floor, I think. If not, it'll go on floor 2 and the top floor will have a sort of crescent cut out of it to accommodate the tallest part of the saucer. The black thing on the bottom floor is the heater pad. Oversized water bottle because this thing will eventually be intended for very long submersions, at depths up to 8 feet. If hamsters could coexist (they can't) I'd rate this for between 6 and 10 of 'em. Mice would do a lot better in those numbers.


Wednesday, September 3, 2014

Lexan skylight purchased.

Along with the nuts and bolts I need to mount it. I'll be using cyanoacrylate glue to seal it. Man am I nervous about drilling into the enclosure lid! I don't know what type of plastic it is. Some kinds are just fine being drilled/dremeled. Others are brittle and crack/shatter when you do that. If it does crack, it isn't as though I can just buy a replacement lid, it's part of the enclosure. I'd be out $200. Crossing my fingers.

Also! I've gotten new filter cartridges and something called algae gone which should halt algae growth from now on. That's been a huge pain in my ass, so I hope this stuff works.

Thursday, August 28, 2014

Preparing to buy lexan skylight for enclosure lid

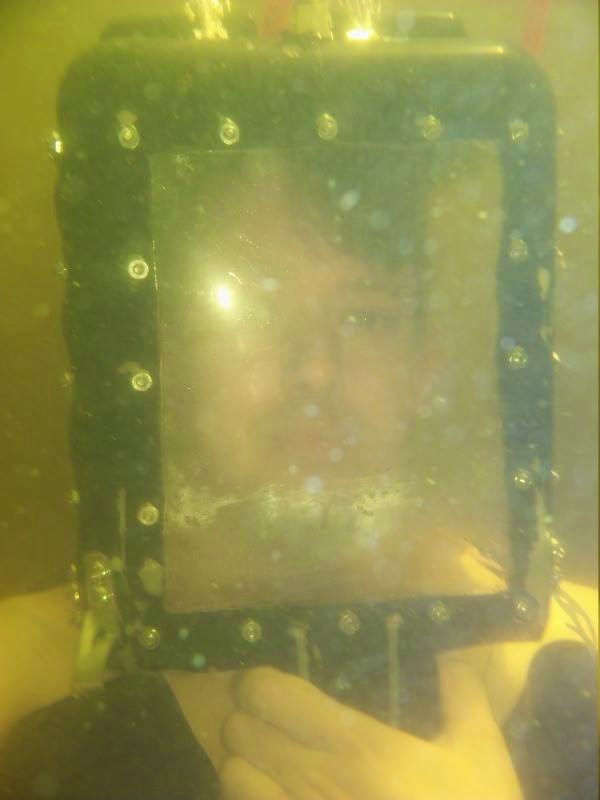
Just returned from one month vacation to Minnesota. Much of which I spent at the bottom of a lake:


The helmet 'lives' at the lake cabin now as that's really the only place I have easy access to both a large body of water and nearby grid power for the compressor. If I ever put together what I need for the vast modular colony of 100+ hambros I'm envisioning it will necessarily be in that lake, receiving power for the air compressors and heating pads (and lights?) from the cabin.

The 200 feet of air hose let me get far enough from shore that I was perhaps 20 feet down, and it was very serene just to set up a chair down there, sit in it and wait for the initial disturbance to settle so that marine life would resume its normal routines around me. Despite the poor vis I had a number of fish come right up to me, presumably too baffled by my presence to be frightened. Had some very interesting thoughts down there, and saw some troubling shadows.

Will resume work on new habitat shortly, stay tuned.


Saturday, June 28, 2014

Building the removable second floor

I've cut out the piece of plastic that will serve as the second floor of the new habitat. Also measured and cut the dowels that will support it and found all of the nuts/bolts I'll need for mounting the dowels, the ballast pods and the skylight. 


This thing really is big. I'm not sure how apparent it is from the pic below (I included one of the running saucers for scale) but even one floor of it is about 30% larger than Hambase Alpha. And there'll be two such floors, with enough vertical room that both could have a running wheel if necessary. Or two each?


Tomorrow I'll run out to Home Depot and look for a piece of lexan suitably sized for the 'skylight'. Probably the same precut piece I also used as the front and side windows for my diving helmet as they happen to be exactly the right size for this as well.

Adding in a skylight is only necessary to begin with because the enclosure didn't turn out to have a transparent lid as advertised. It bothers me that I'll have to compromise the integrity of the enclosure so much by cutting out a frame for the lexan window, mounting it with bolts and sealing it with silicone/cyanoacrylate, but as the lid is very rigid and doesn't flex much I expect to be able to make it very watertight. The opaque rim of the lid will also give me someplace discreet to mount down-facing LED light strips later on.

As an aside, I tried to sink this sumbitch in the tub using all six of the 5lb lead block weights I have now but it wouldn't sink. Which means the dual Otterbox 3000 ballast pods I used for Hambase Alpha will not cut it here. Even three of them won't be sufficient. Luckily the same company makes a container with the same footprint, but twice as 'deep', the Otterbox 3500. This means I can fit four block weights (20lbs) into each ballast pod.

This should allow me to mount either two (for a total of 40lbs) or three (for a total of 60lbs) as necessary. At this point I strongly suspect it'll take three of 'em. This will put the ground floor up a little bit higher than Hambase Alpha's, but when I get around to connecting them with the modular gate/tube system, the tubing is flexible so a slight elevation difference shouldn't be a big deal.

Here's the type of weight I need > (Link) There it appears to be sold in lots of 8. There are two such lots remaining. Buying both would give me enough weights for Hambase Delta, plus four extra I could use for the removable food module and the removable waste module. If a wealthy, generous, mentally unbalanced person is reading this and would like to greatly accelerate work on this project for his or her own perverse satisfaction, I'll need about $220 to buy the weights I need plus another $60 for 3x Otterbox 3500.

Monday, June 23, 2014

Very Large Habitat Concept


This one's a bit "outside the box". It's a large ham ham colony based on this kind of inflatable underwater shelter:


As you can see, a few people have done this for their own use, and luckily for me when done the way they did it, it isn't especially expensive. The second one is of particular interest as it needs no weights! It is secured to a crevice in the rocky surface of the bottom. Wherever it's possible to do this, this method is ideal as 99% of the hassle of doing this sort of thing is weighing down all that air. Anyway, on to the main attraction:


This assumes no such crevice will happen to be handy for securing the thing and that weights (many buckets of sand I will fill underwater, then secure the sheet of plastic to, then release air from a scuba tank into it) will be necessary. As you can see, the hambro living space consists of the same type of cage they live in on land, made from stacked, bolted together transparent plastic storage bins with a climbing tube to get between floors.  

These simply float on the "surface" of the water inside the big bubble of trapped air. Holes in the lid allow fresh air to circulate into the cages, as usual, and fresh air is sent down to the inflatable dome shelter using the same oil free electric air compressor I used to supply my diving helmet. This will ensure an ample airflow suitable for more hamsters than I could reasonably fit in the thing.
  
Crucially, this lets me surface inside of it to open the cages, clean out the 'dirty spots', resupply food and water, etc. without bringing any of it up to the surface. And because of the more powerful compressor, this thing can be up to 21 feet deep if I ever want to surface the hams for any reason or with a yet more powerful compressor, up to 50 feet deep (the limit of using normal air before the oxygen content in it becomes toxic) if I was content for them to live down there for their entire lifespan (as I would be unable to safely surface them due to the nitrogen in their tissues).

I think I could fit about four floating cages in there and still have enough room to surface and maintain them. With 3 hams per cage, that's a population of 12. I could go higher but I can usually only find siblings in groups of 3 or less.

This would be very fault tolerant as well. The enclosures themselves don't have to be sealable or remotely watertight around the rims, just able to float stably. Overpressure inflatable shelters are in general pretty foolproof, just not commonly large enough for a person to live in. For hamsters however, it's massive, and if you were going to conduct an experiment to determine what effects living underwater for several generations has on complex mammals, this would be the way to do it.

Wednesday, June 11, 2014

New enclosure arrives, and it's huge

Moreso than I expected. Easily the same volume as the 2 story cage they live in on land (I set it next to the existing habitat for comparison. That's the heater pad inside it.) Just one problem, the lid is opaque. I can't exchange it because according to the site, the manufacturer no longer makes the fully transparent version and they have none of that model in stock. So, I will at some point be adding a large transparent lexan window into the lid to allow light through. Maybe some LEDs around the interior rim?


Sunday, June 1, 2014

New dry case purchased

It'll take quite a while to get here as it's coming from China. Which is also the reason for the insane $71 shipping. But to the best of my knowledge this is the largest transparent dry case available, which means a habitat roughly twice the interior volume of the one I'm using now. And it will become the hub for a system of modular interconnecting habitats to follow. Stay tuned.

Thursday, May 29, 2014

Human Hampture!

After his successful Biosub 1 experiment in 2005, marine biologist Lloyd Godson secured funding from National Geographic to do a Biosub 2 project....in a giant aquarium at Legoland Germany. Sound familiar? Visitors could watch him go about (most) of the daily procedure of eating, exercising and so on, while he stayed down for 14 days to break a record. While there, he generated all of the electricity he needed to run his laptop, lights and other gear using the pedal bike. More significantly he did Biosub 1 out of his own pocket, and Biosub2 with National geographic funding. Unlike space, undersea habitation is possible to do with the kind of money you could get from kickstarter. Studying how he went about it would be a good idea for anyone who dreams of someday building their own little underwater vacation home.

Tuesday, May 27, 2014

Free idea:

I don't have the resources to pursue this in addition to Hampture, so I'm just giving it away: Fasten a small harness to the underside of a quadrotor, so that a chicken can experience the joy of flight. "Project: Arise, Chicken!"

Sunday, May 11, 2014

Generous donations!

I recently received two donations, one for $100 and the other for $40. With this I am only $60 short of buying the Delta enclosure! ($118 + $70 shipping) The two donors did not want to be identified, which I understand. I wonder how they'll explain this on their taxes.

Friday, April 25, 2014

Hambase Delta

This is my design for a new habitat based around the largest transparent acrylic drybox that I am aware of. At the time Hambase Alpha was built, the case it uses was the largest available, but since then I've discovered a yet larger one, seen here.


As you can see, there is roughly twice the interior space as Hambase Alpha, but no wheel. This is because Delta is not intended to be a standalone habitat. It will be the first habitat designed around modularity, using the gate valve and flexible tube joining system described here. This will allow me to connect it to Hambase Alpha, as seen in the diagram below:

This will satisfy the two main requests I've had from people following this project: More living space for the hambros, and multiple habitats connected by tubes. The resulting pair of connected habitats will have a running wheel, two water bottles, a considerably improved electric heater pad which covers nearly the whole floorspace of Hambase Delta's floor 1, three different 'rooms' to occupy, more room for food, in all ways ideal conditions for very long underwater stays. Hypothetically once I've proven the linking tunnel system it will be possible to connect any number of habitats. I just don't have the money for that. Or even for 2. I have so far received $30 in donations towards this, which is enough to buy one ballast pod without weights and a water bottle.

If I can eventually managed to built this 2 hab assembly, I am satisfied with it. It has everything I think is necessary for safety, comfort and ample living space for long periods, it realizes the Hampture concept without sacrificing or compromising anything and it's a complete demonstration of a generalized modular habitat system that anyone interested in doing so can replicate for their own use. I would, when this is complete, point a webcam at it and livestream the hambros going about their undersea lives 24/7 like I did last year. 

Wednesday, April 23, 2014

Introducing Cousteau and Nemo

Bought some new ham hams today. Got two this time. More than one because a solitary ham would be lonely, but not three because Hambase was a bit crowded with 3 occupants, and the larger habitat I have planned won't be ready for a long time unless donations pick up. Was going to name them Demon Semen and Fart Tornado but figured that would not go over well. Other possible names included McNugget and Sodomite. I am not good at naming animals.

Tuesday, April 22, 2014

Habitat refurbishing

As you'll recall, the heaters in Hambase Alpha broke toward the end of it's use. The problem was I had exposed connectors on the outside of the hull that the USB cords plugged into to supply power. Water got into the space inside the connectors and rusted them to the point that power was no longer being delivered (It isn't salt water, so there wasn't a significant short and the heaters worked fine until rust set in)

Since I had a bunch more heater pads laying around (these are cheap) I decided to finally get around to adding a pair of them to Hamlab. I never left a hamster in this habitat for any length of time before because it didn't have heaters. I didn't bother adding any because why have any of them live here when they could enjoy the more spacious, wheel equipped Hambase? But with Hambase undergoing refurbishment, I'd like to have one hab fully equipped to support a hamsternaut comfortably. I plan to buy a new set of hambros soon. This won't hold three or even two, it's just enough space for one of them, for durations of 1-3 days (as there is no wheel) this should at least get me back into the business of underwater hamster shenanigans, and motivate me to fix up Hambase Alpha faster.

What it needs is to have the two little heating pads (like those in Hamlab) removed, and replaced with a Reptitherm 110v heater pad that covers nearly the whole floor. This way, three hams don't have to fight over two small heating pads, each only big enough for one of them. Even when the heaters in Hambase worked, that was a problem.  Sufficient, even heating is an absolute priority for submerged small animal habitats. They aren't big animals, they lose heat easily and have fast metabolisms. They originally lived in deserts, so they need to be kept warm. Even with an aquarium water heater, the temp your fish like is still uncomfortably cold to a small mammal. Anyone working on their own such habs should take note, if it hasn't got a heater, it isn't fit for occupation for longer than a few minutes. If it hasn't got a wheel, a few days is the maximum 'mission duration' I recommend, as they need the exercise+stimulation.


Friday, March 28, 2014

I appear to have popularized the world's strangest hobby.

http://aquahams.blogspot.com/


A long time follower of this blog has begun his own similar project, "Aqua Hams", with promising early results. I'd have some serious reservations about this if he weren't an engineer, and will be advising him as to how to ensure the safety and comfort of any animals he involves (the current prototype is "un-hammed" and is mostly a proof of concept for the time being.)

Sunday, February 16, 2014

The inspirations for this project

Although named after the city from Bioshock, the idea of a functional scale model underwater city has been a project that I've thought about off and on for years. The idea for it came from similar stuff I'd already seen.

Hampture pretty much already existed in Earthworm Jim, as the "Down The Tubes" level. It's an underwater city comprised of transparent hamster tubes, habitat enclosures, and hamsters that run around inside:


 The underwater elevator scene from Secret of Nimh was also an influence:


There was also the general "High tech shit built for small creatures to use" seen in stuff like Rescue Rangers, but Down the Tubes and Secret of Nimh were the main ones that led me to seriously consider the practicality of building this kind of shit.

Friday, January 24, 2014

Do any of you live in Oregon and have a body of water on your property?

...And do you want an underwater hamster city in it?

It must be at least 8 feet deep, relatively good visibility (Not muddy water) and have nearby access to grid power and wifi (for webcam streaming). This means within reach of an extension cord, so no more than a few hundred feet maximum. If the wifi won't reach that far I can supply a directional signal booster that should do the trick.

The deal is that if I'm going to build a permanent modular colony, I'll need someplace to put it that is on privately owned land with access to the infrastructure it will need to stay under for good. It will be using some small amount of your electricity and bandwidth. We can discuss compensation but ideally participation in this project and having an underwater hamster city in your back yard is what you get out of it. I would visit monthly or bi-monthly, to dive down to the colony in order to add more hamsters and restock it with food/water.

If you find these conditions agreeable and have a body of water on your property that's suitable, please take pictures of it and post them in the comments along with your zip code. If it looks good, I'll contact you for more specific info.

Monday, January 20, 2014

A breakthrough in connecting multiple habitats!


On the recommendation of a clever follower of the blog, I've researched PVC valves, flanges, fittings and flexible duct hosing with which to safely connect multiple habitats while they're submerged. Before, I had imagined a ridiculously overcomplicated system of wirelessly signaling arduinos to open interior O-ring sealed hatches using servos in order to safely "dock" modules to each other while underwater. Way too expensive and fault prone.

The only alternative to this I could see was to permanently mount every enclosure you wanted to be connected to the same rigid, custom milled metal platform so that when you join them with rigid acrylic tubes, there's no stress on the spots where the tubes pass through the hab walls. But this has to be built as one piece, cannot be expanded afterward and would be tremendously heavy. Given that the whole thing would need to be removed from the water every time you want to clean the litter or resupply food and water, this approach is no more feasible than the last.

So, along comes this guy to suggest a better method which is honestly as big of a breakthrough as when I found the ideal ballast pods/weights combo a while back. It will make it possible and relatively easy to join as many habitat enclosures as I have money for, and to resupply food and clean litter without surfacing all of it.

Basically, each enclosure will have a flange mounted to the wall, and a gate valve mounted to that. They are like little watertight doors I can open and close from the outside, by hand, by turning the little knob. The idea is there's one of these on each of the four walls so you can expand from it. The way you expand is by sinking another habitat next to it, screwing one end of the duct hose onto the gate valve (which will need a threaded screw-on fitting for this) then screw the other end of the hose to the gate valve on the other habitat. Then you use a bottle of compressed air to purge the water from the hose interior through a little, sealable opening in the lowest point of the middle of the hose. Once the water's been blown out in this way you can seal both the bottom opening and the little fitting you blew compressed air in through, open both gate valves, and presto the habitats are connected. If this sounds hard to understand, don't worry, at some point I'll do a step by step illustration. Rest assured it's entirely feasible.


How the food resupply/litter replacement works is that the smallest module size (transparent Otterbox 3500 bolted to a ballast pod consisting of a black otterbox 3000 with two 5lb diving weights inside) is used as a swappable food container, and another identical to it but with only litter inside is the "bathroom". Hamsters typically pick one spot to piss and shit, and you can control where that is by putting some of their dirty litter in the spot you'd like them to do their business. So you do that with one of the small modules. Mostly clean litter with a small amount of waste to clue them in to the fact that you want them to use it as a bathroom. When it gets foul enough, you close the gate valves, detach it, swim to the surface with it, and empty it into the trash (keeping a small amount of the dirty litter.) Then you put fresh litter in there, and add the small amount of dirty litter to it. Now you can swim back down to the colony and re-attach this module to it. Presto! Same goes for the food module. Resupplying food and removing waste is now, finally, feasible in a low tech and easily built method. This means I can finally have very large networks of habitats that permanently stay underwater and never need to be surfaced! Incidentally, a small module of the same size as the food and waste modules would be used to transport additional hamsters down to the colony.

The water bottle replacement scheme is even simpler. The hole in the roof that the metal drinking straw/tube passes through is now covered by, for lack of a better term, a stretchy rubber sphincter. The idea is that you can push the water bottle's tube through it and it forms a seal. But also, when you remove the water bottle, the hole in the rubber is tiny enough that bubbles escape but water doesn't enter. You can just quickly swap the empty water bottle for a filled one without ever risking any amount of water getting in.

For the first time, every conceptual piece is in place for a truly permanent underwater colony of any size I'm able to afford. That was never the case before, not the way I thought I'd have to do it. Now, provided the funding, I can easily supply things people have been eagerly asking for: More living space in the form of multiple enclosures linked by tunnels, true permanence to the point that I never have to surface the habitats (except small food/waste modules) once they're in place.

So, which specific parts and why? I've settled on a two inch diameter standard for the hose, valves and fittings so the hamsters can squeeze by one another (Their bodies are about an inch wide). Otherwise even in very short tubes they will sometimes both try to pass through in opposite directions and fight over who gets to pass, as seen in some of the early videos with Hampture Mk.2.5. They are pretty much the Zax, in rodent form. Anyway here's the parts list I've come up with. Won't let me link directly to the specific parts for the first and third items, so I've included the model numers/names for you to plug into ctrl+f.


600-2370 2inch slip socket by slip socket Gate Valve: http://flexpvc.com/cart/agora.cgi?product=PVC-Valves-Gate

Flexadux R-2 PVC Duct Hose, Clear, 2" ID, 0.020" Wall, 25' Length: http://www.amazon.com/dp/B0050IGYKW/ref=biss_dp_t_asn


851-020 2inch socket solid flange: http://flexpvc.com/cart/agora.cgi?cart_id=14688260.31875&product=PVC-Flanges-Solid

What I cannot yet find are screw-on male and female threaded fittings for mating the hose to the gate valves. When I've identified that final component, permanently submerged colonies of any size will finally be within reach. I think that's what this is: http://www.amazonsupply.com/dp/B008I4DV2E/ref=sp_dp_g2c_asin
....But I'll need to buy a sample unit to be sure. If it ever gets to the point where I actually have to money to construct a large permanent colony of the type I've been describing, I'll need to find a fan of the blog who lives in Oregon and has a body of water on their property with at least some portion of it that is 8 feet deep or shallower, with nearby access to grid power. But we'll cross that bridge when we come to it, eh? First things first: Gotta build some modular demonstration habitats to show that this method of connecting them while submerged will work.

Saturday, January 11, 2014

Last of the three original hamstronauts has passed away.

I'm sorry to report that all three have now perished from old age. I'd hoped to send them on a last adventure aboard Skyhab before then but they didn't hang on long enough. They've still lived pretty incredible lives for hamsters. :')

Once I can get my hands on enough helium to lift Skyhab, I will invest in the next round of ham hams.